This page provides security information for Windows users. For general information on security measures and precautions, please refer to the Security Tips page.
Automatically Checking for Security Updates (Windows 10)
For information on managing your security update settings in Windows 10, see the Update Windows 10 page on Microsoft’s support site.
Automatically Checking for Security Updates (Windows 8.1)
- Press the Windows key on the keyboard or click the Windows button on the bottom left-hand corner of the screen.
- In the box that appears, start typing control panel and click the first option that appears.
- In the Control Panel, select Windows Update. The Windows Update window displays.
- Verify the updates.
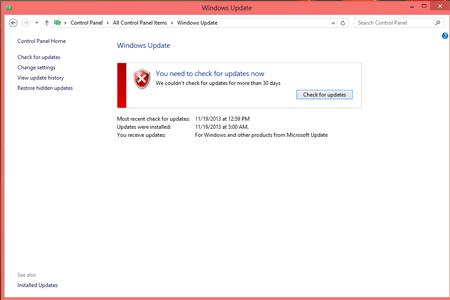
Note: The Windows Update screen will vary slightly depending on which edition (Home, Ultimate, or Enterprise) you are running.
Automatically Checking for Security Updates (Windows 7)
- From the Start menu, select Control Panel.
- In the Control Panel, choose System Security
and then Windows Update. The Windows Update window displays. - Verify the updates.
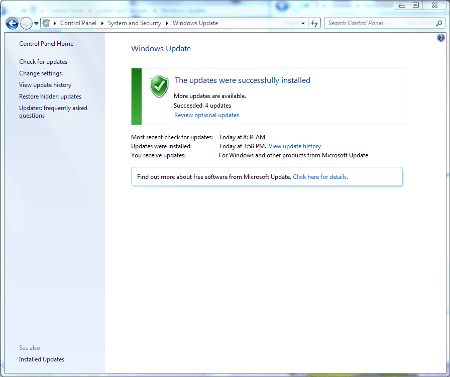
Note: The Windows Update screen will vary slightly depending on which edition (Home, Ultimate, or Enterprise) you are running.
Before you connect your computer to the USC network, you should make sure your computer has the appropriate patches installed. See Windows Security Patches.
Using a Firewall
The Windows operating system is designed to work within a networked environment. The Windows operating system has built-in, server-level services that cannot be turned off. To protect your computer, you must run a firewall. ITS recommends that users with computers running the Windows 10, Windows 8.1, and Windows 7 operating systems use the firewall that is built into these operating systems.
Turning on the Firewall in Windows 10
See the Microsoft support website for information on turning on the Windows Defender firewall in Windows 10.
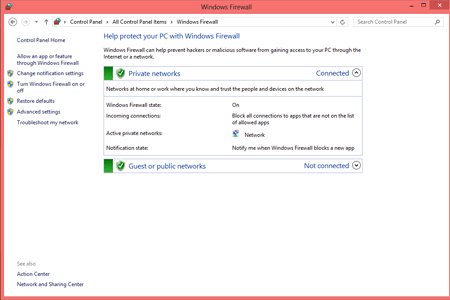
Turning on the Firewall in Windows 8.1
- Press the Windows key on the keyboard or click the Windows button on the bottom left-hand corner of the screen.
- In the box that appears, start typing control panel and click the first option that appears.
- From the Control Panel, select Windows Firewall.
- Make sure Windows Firewall state is listed as On.Note: If On is not selected, your security definitions are already outdated, and you should download the most recent service pack available for your operating system at the Microsoft website.
- To turn on the Windows Firewall:
- Choose Turn on Windows Firewall from the menu on the left side of the screen.
- Select Turn on Windows Firewall for both Home or work (private) network location settings and Public network location settings.
- Click OK.
- Close the Windows Firewall screen when you are finished.
Turning on the Firewall in Windows 7
- From the Start menu, select Control Panel
- From the Control Panel, select System Security and then Windows Firewall.
- Make sure Windows Firewall state is listed as On.
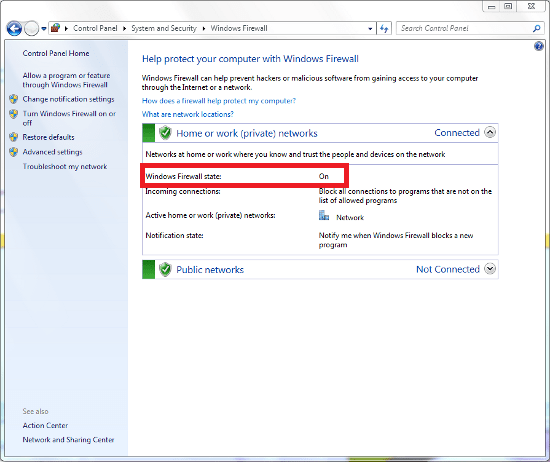 Note: If On is not selected, your security definitions are already outdated, and you should download the most recent service pack available for your operating system at the Microsoft website.
 - To turn on the Windows Firewall:
- Choose Turn on Windows Firewall from the menu on the left side of the screen.
- Select Turn on Windows Firewall for both Home or work (private) network location settings and Public network location settings.
- Click OK.
- Close the Windows Firewall screen when you are finished.
Additional Information
For detailed information on Windows Security, see the CERT website.
Getting Help
The ITS Customer Support Center provides support for software available on the software download page. For help with other programs, contact the software’s vendor or go to the vendor’s website.
For questions, please contact the ITS Customer Support Center.